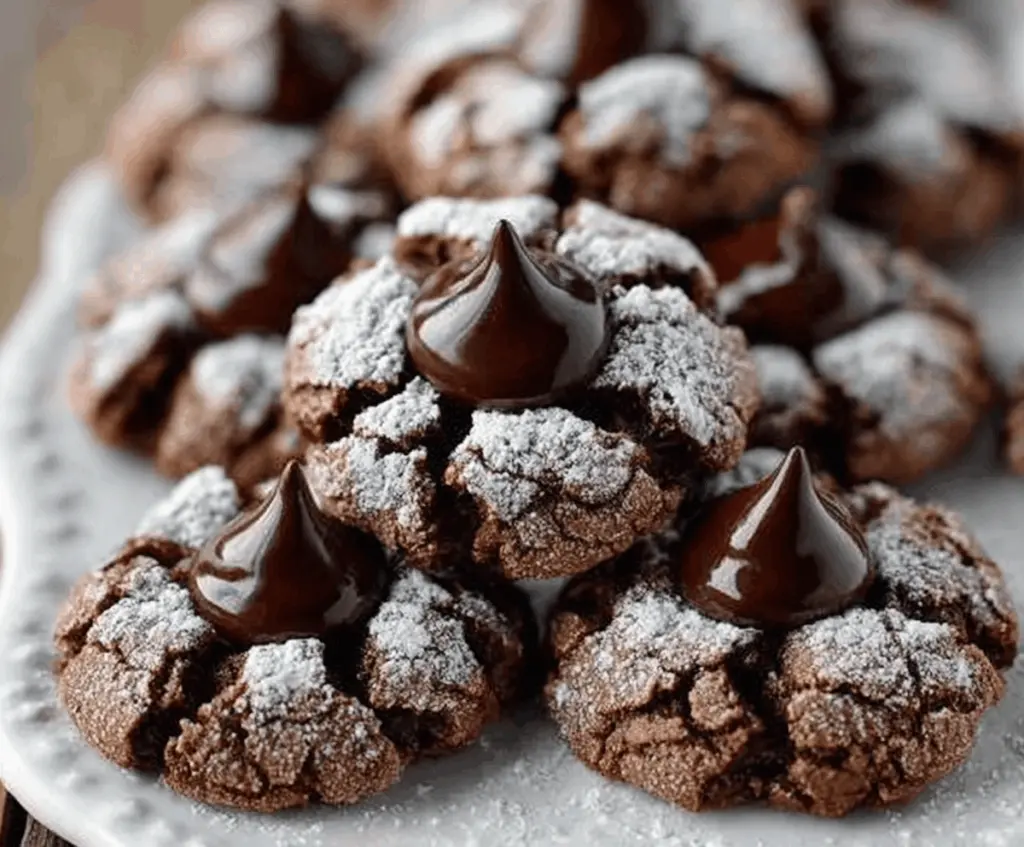
Chocolate Blossom Cookies are a delightful treat that combine soft, chewy chocolate cookie dough with a sweet, melty chocolate kiss right in the center. The contrast between the rich cocoa flavor and the burst of chocolate from the candy makes each bite a little moment of joy. These cookies have a fun, festive look thanks to the colorful candy tops, which makes them perfect for sharing or celebrations.
I love making these cookies because they’re simple but so satisfying, especially when you catch that warm chocolate kiss just beginning to soften. One tip I always remember is to press the chocolate candy gently into the cookie as soon as they come out of the oven—that way, it melts just right without losing its shape. Plus, they’re a great recipe to get kids involved with because the final step of placing the candies is as fun as eating them!
These cookies are my go-to when I want to bring a little happiness to a gathering or just treat myself during a cozy afternoon. I find they go well with a glass of milk or a cup of coffee, and they always bring out smiles. Whenever I bake a batch, the house fills with the warm smell of chocolate, which instantly makes everything feel more inviting and homey.
Key Ingredients & Substitutions
All-purpose flour: This is the base of the cookie dough. You can swap in a gluten-free flour blend if needed, just check for one that’s meant for baking to keep the texture nice.
Cocoa powder: Unsweetened cocoa powder gives the rich chocolate flavor. Dutch-processed cocoa is smoother and less bitter, but natural cocoa works well too.
Butter: Use softened unsalted butter for the best flavor and texture. You can use margarine or a vegan butter substitute, but the texture might change a bit.
Sugars: The mix of granulated and brown sugar creates sweetness and chewiness. Brown sugar adds a little extra moisture and a hint of caramel flavor.
Chocolate kisses: The star of the cookie! Classic milk chocolate works great. You could try dark or white chocolate kisses for a twist.
How Do You Get that Perfect Cracked Look and Soft Center?
The cracked surface is a sign of a tender, fudgy cookie. Here’s how I make sure mine turn out great:
- Chill the dough briefly if it feels too sticky. This helps it hold shape on the baking sheet.
- Roll each ball well in powdered sugar to get that snowy coating, which highlights the cracks.
- Bake just until the edges set but the centers still look soft. Overbaking can make cookies dry and lose that crackled charm.
- Press the chocolate kiss into the cookie immediately after baking, while the cookie is warm. This softens the chocolate nicely without melting it away.
- Let cookies cool a bit on the baking sheet before moving them, or they might break.

Equipment You’ll Need
- Baking sheets – I use these because they distribute heat evenly and help keep the cookies from sticking.
- Silicone baking mats or parchment paper – makes cleanup easy and prevents sticking.
- Mixing bowls – large for creaming the butter and sugars, and medium for dry ingredients.
- Electric mixer or whisk – helps make the creamed butter and sugars light and fluffy.
- Cookie scoop or tablespoon – for portioning dough evenly.
- Cooler rack – to let the cookies cool completely without getting soggy.
- Unwrapped chocolate kisses – the star toppings that melt perfectly into the cookies.
Flavor Variations & Add-Ins
- Use dark or white chocolate kisses instead of milk chocolate for a different flavor. They melt just as nicely and add variety.
- Stir in mini chocolate chips or chopped nuts into the dough for extra texture and flavor.
- Add a pinch of cinnamon or chili powder to the dry ingredients for a spicy kick that pairs beautifully with chocolate.
- Swap some of the powdered sugar coating with colored sanding sugar or sprinkles for a festive look.
How to Make Chocolate Blossom Cookies
Ingredients You’ll Need:
- 1 cup all-purpose flour
- 1/3 cup unsweetened cocoa powder
- 1 teaspoon baking powder
- 1/4 teaspoon salt
- 1/2 cup (1 stick) unsalted butter, softened
- 1/2 cup granulated sugar
- 1/3 cup packed light brown sugar
- 1 large egg
- 1 teaspoon vanilla extract
- 1 cup powdered sugar (for coating)
- About 36 chocolate kisses (e.g., Hershey’s Kisses), unwrapped
How Much Time Will You Need?
This recipe takes about 15 minutes to prepare and around 10-12 minutes to bake each batch. Allow an extra 10 minutes for the cookies to cool and set before moving them. Overall, expect about 30-40 minutes from start to finish.
Step-by-Step Instructions:
1. Prepare Your Oven and Dry Ingredients:
Start by heating your oven to 350°F (175°C). Line your baking sheets with parchment paper or silicone mats to prevent sticking. In a medium-sized bowl, whisk together the flour, cocoa powder, baking powder, and salt. This blends your dry ingredients so they are ready to combine later.
2. Mix the Wet Ingredients:
In a large mixing bowl, beat the softened butter, granulated sugar, and brown sugar together until the mixture is light and fluffy—this usually takes around 3 to 4 minutes. Then, add the egg and vanilla extract, mixing until everything is well combined.
3. Combine Dry and Wet Ingredients:
Slowly add your dry ingredient mixture to the wet ingredients, mixing just until combined. Be careful not to overmix, as this can make cookies tough.
4. Coat and Shape the Dough:
Pour the powdered sugar into a shallow bowl. Using a tablespoon or cookie scoop, take portions of dough and roll each into a ball. Then, roll each dough ball in the powdered sugar, coating it completely. Place the coated dough balls on your prepared baking sheets, spacing them about 2 inches apart to allow room for spreading.
5. Bake and Add the Chocolate Kiss:
Bake the cookies for about 10-12 minutes. You’ll notice the edges firming up while the centers stay soft and develop cracks — that’s perfect! Once out of the oven, press an unwrapped chocolate kiss gently into the center of each cookie. The warm cookie will crack around the chocolate, creating that classic Blossom look.
6. Cool and Serve:
Allow the cookies to cool on the baking sheet for at least 10 minutes, giving the chocolate time to set. Afterward, transfer the cookies to a wire rack to cool completely. Now, your fudgy, chocolatey Chocolate Blossom Cookies are ready to enjoy!
Can I Use Frozen Butter for These Cookies?
It’s best to use softened butter at room temperature for this recipe. Frozen butter won’t cream properly with the sugars, which can affect the texture. If your butter is frozen, let it thaw fully and soften before starting.
Can I Substitute the Chocolate Kisses?
Absolutely! You can use any type of chocolate candies or chocolate chunks you like. Just make sure they’re unwrapped and firm enough to hold their shape when pressed into the warm cookies.
How Should I Store Leftover Cookies?
Store your Chocolate Blossom Cookies in an airtight container at room temperature for up to 4 days. To keep them fresh longer, you can refrigerate them for up to a week or freeze for up to 3 months. Thaw completely before serving for best texture.
Can I Make the Dough Ahead of Time?
Yes! You can prepare the dough and refrigerate it for up to 2 days. Just bring it back to room temperature before rolling into balls and coating with powdered sugar. This also helps enhance the flavor as the dough rests.